반응형
Synology NAS 에 발급 받은 인증서를 라즈베리파이 nginx 에 적용하기
Synology NAS 도 가지고 있고 라즈베리파이도 가지고 있는 상태에서
라즈베리파이의 nginx 세팅에 인증서를 적용하고 싶다면 다음과 같은 방법으로 사용
1. Synology NAS 에서 인증서 내보내기
제어판 -> 보안 -> 인증서
해당 인증서 선택 후 마우스 우클릭 -> 인증서 내보내기
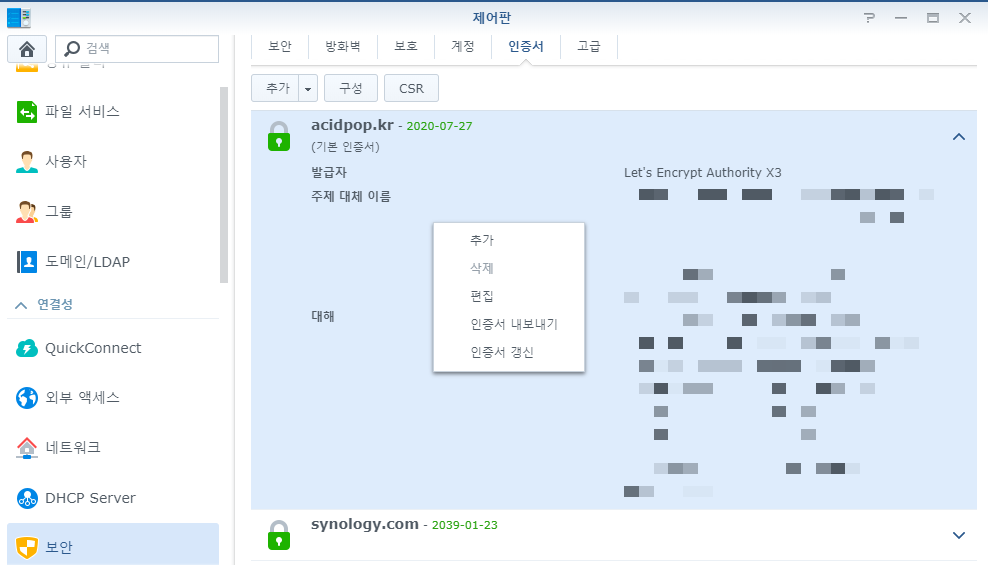
인증서 내보내기를 하면 압축파일을 다운로드 할 수 있다.
2. 라즈베리파이 접속 (nginx 가 설치 되어 있는 상태)
mkdir -p /home/pi/cert
/home/pi/cert 경로에 다운로드 받은 인증서 압축 파일 업로드
unzip _archive.zip
unzip 명령으로 압축 파일 해제
3. pem 파일 합치기
압축을 해제 하면 cert.pem, chain.pem, privkey.pem 파일이 보이는데
이 중 cert.pem 과 chain.pem 파일을 합쳐야 한다.
다음 명령으로 파일을 합치자.
| cat cert.pem > fullchain.pem && echo -e "\n" >> fullchain.pem && cat chain.pem >> fullchain.pem |
4. nginx 설정 변경하기
sudo vi /etc/nginx/sites-enabled/default
server 설정 부분 중 빨간 색 부분 확인
| server { listen 80 default_server; listen [::]:80 default_server; # SSL configuration # listen 443 ssl default_server; listen [::]:443 ssl default_server; # Self signed certs generated by the ssl-cert package # Don't use them in a production server! # include snippets/snakeoil.conf; root /var/www/html; # Add index.php to the list if you are using PHP index index.html index.htm index.nginx-debian.html index.php; server_name pi.acidpop.kr; ssl_certificate /home/pi/cert/fullchain.pem ssl_certificate_key /home/pi/cert/privkey.pem location / { # First attempt to serve request as file, then # as directory, then fall back to displaying a 404. try_files $uri $uri/ =404; } # pass PHP scripts to FastCGI server # location ~ \.php$ { include snippets/fastcgi-php.conf; # With php-fpm (or other unix sockets): fastcgi_pass unix:/run/php/php7.3-fpm.sock; # With php-cgi (or other tcp sockets): # fastcgi_pass 127.0.0.1:9000; } # deny access to .htaccess files, if Apache's document root # concurs with nginx's one # #location ~ /\.ht { # deny all; #} } |
5. 빨간색으로 표시 된 부분을 추가/수정 한 다음 설정을 다시 로딩하기
sudo /etc/init.d/nginx reload
'강좌 > RaspberryPI 활용' 카테고리의 다른 글
| Raspbian 에 python 3.8 Selenium 및 chromedriver 설치 (0) | 2019.12.16 |
|---|---|
| pi hole 암호 변경 (0) | 2019.03.14 |
| Raspberry pi - Raspbian stretch python 3.7 설치 (0) | 2018.09.10 |
| Raspberry pi FFMpeg 설치 (2) | 2017.07.05 |
| Raspberry pi 와 Arduino Pro Mini - RF 433 통신하기 (4) | 2017.02.03 |
| Raspberry pi touch screen 깨우기 (0) | 2017.01.25 |
| Raspberry pi - Python 3.5 설치 하기 (12) | 2016.10.11 |
| Telegram CLI 시작 프로그램 등록하기 (18) | 2016.07.25 |